


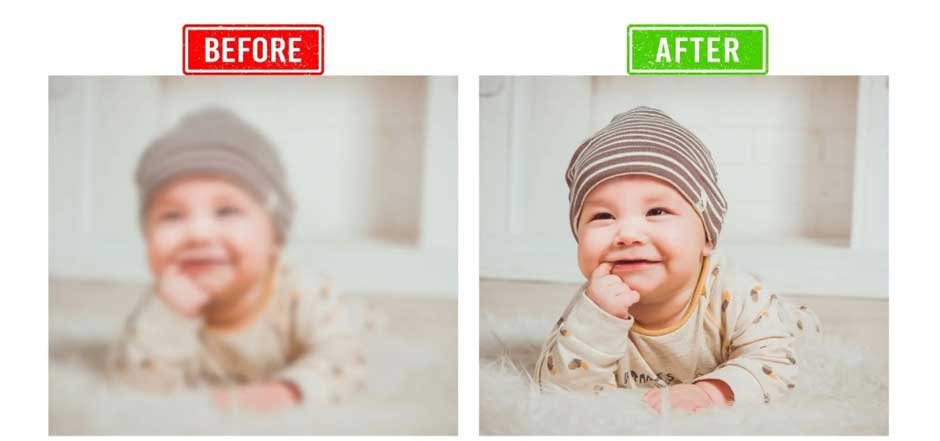
Is your photo appearing blurry or distorted? Such instances can be terrifying, especially if your photo holds sentimental or professional value. If you ever experience such an issue, don’t worry. Whether the problem is due to camera shake, incorrect focus, motion blur, or any other reason, the good news is that there are several photo repair workarounds available that you can try to repair these photos. You can use third-party software tools, AI-powered technology, etc., to bring your photo back to normal.
In this guide, we will explore different methods on how to repair blurry photos without losing quality. Just go with these methods one-by-one to fix your photos with minimal loss in quality.
Common Reasons for Blurry or Distorted Photos
Understanding the exact cause of your damaged photo(s) will help you determine the effective method of corruption. Some main reasons why photos appear blurry or distorted include:
- Motion Blur: This mainly occurs if the subject or camera moves while the shutter is open. It is one of the main reasons for blurry photos if captured in low-light or have long exposures.
- Out-of-Focus Blur: If your camera fails to focus properly on the subject (which mainly occurs due to improper autofocus or incorrect manual settings), it will generate blurred photographs.
- Camera Shake: Apart from motion blur, if your camera shakes while capturing photos, it affects the entire image.
- Lens Distortion: Wide-angle lenses often introduce barrel distortion (curving outward) or pincushion distortion (curving inward), especially at the edges of the image.
- Scaling Issues: Enlarging a small photo without proper algorithms causes pixelation or loss of sharpness.
How do I Repair Blurry or Distorted Photos?
Now it’s time to implement adequate photo repair workarounds which can help you to repair blurry or distorted photos without losing quality. Here are some popular methods which can help you restore a better-quality image:
Method 01: Use Photoshop
Photoshop is one of the powerful tools which allows you to repair corrupt or damaged photos in multiple ways. To repair your photos using Adobe Photoshop, you can consider the following ways:
01: Smart Sharpen Filter
Launch the Photoshop application.
Go to Filter > Sharpen > Smart Sharpen.
Now, adjust the Amount and Radius sliders.
Use the Reduce Noise option to avoid graininess.
02: High-Pass Filter Technique
Firstly, duplicate your image layer.
Start a new layer’s blending mode to Overlay.
Now, go to Filter > Other, then select High Pass and adjust the radius.
Method 02: Repair Photos Manually
You can manually edit your photos, like adjusting their sharpening, exposure, etc., to enhance quality. There are several AI tools as well as software programs (like Adobe Photoshop, GIMP, etc.) available which can help you to edit your blurry or distorted photos without losing quality.
Here’s how you can sharpen your image using Photoshop:
- Firstly, you need to convert your image to a high-resolution format (TIFF or PNG).
- Use a sharpening filter like High Pass Filter or Unsharp Mask.
- Now, create a duplicate of your photo layer.
- Then go to Filter > Other > High Pass.
- Also, change the layer blending mode to Overlay or Soft Light.
Note: This method will selectively sharpen the edges and is mainly used for portraits.
Method 03: Remove Dust, Scratches and Imperfections
If you are working with scanned or problematic images, then a healing or cloning tool can help you fix the image.
- Clone Stamp Tool: It copies and moves pixels to a new location. Mainly used for replacing damaged or missing areas.
- Healing Brush / Spot Healing: You can use this tool to blend the cloned area with the surrounding texture.
- Patch Tool: You can select any desired area and drag it across to a different area that is unaffected to fix large blemishes or rips.
Tip: Use the soft brush setting and take each fix on a separate layer from the original image.
Method 04: Use Third-Party Photo Repair Software
If the above-mentioned photo repair fixes seem confusing, don’t worry, we have the easiest solution as well. You can use a third-party photo repair tool such as Stellar Repair for Photo to fix your blurry or distorted photos without losing quality. It is a professional tool which allows you to repair corrupted, unreadable, or damaged image files of numerous formats in a few simple clicks. You can use this tool to repair photos of JPEG, JPG, TIFF, DNG, CR2, and many other image files.
Why Should You Choose Stellar Repair for Photos?
- It can repair your blurry or pixelated photos easily and effectively.
- It repairs header corruption, missing data, and visual artefacts.
- You can even repair multiple photos in one go using this tool.
- The Preview functionality of this software allows you to preview the repaired photos before saving.
- The software is available in multiple versions, varying in features and prices.
Here’s how to repair blurry or distorted photos without losing quality using this tool:
Step 1: Download and install the Stellar Repair for Photo software from its official site. Launch the application after installation, and from the homepage, click the Add File button to upload the photos you want to repair.
Step 2: Click the Repair button and wait till the software applies corrections to fix blurry visuals and distortion.
Step 3: After completion of the repair process, preview the repaired photos to see a repaired version of the image. Click the Save Repaired Files to save repaired photos to the desired destination folder.
Final Thoughts
Photos that appear blurry or distorted can put you in trouble, but don’t lose hope. There are several tools and techniques available online which can help you restore your photo to its original state. Whether you use professional software like Photoshop, AI tools like Topaz or Remini or some third-party photo repair software tools like Stellar Repair for Photo, it is important to be careful while applying the steps. Moreover, once you restore your repaired photos, save them at a safe location and create multiple backups to help you in future.