


When your water heater suddenly stops delivering warm water, it’s natural to feel frustrated. Whether the issue is minor or more complex, according to Legacy Management company, a repair visit becomes necessary to restore comfort to your home. Many homeowners are unsure about what happens during a professional water heater repair visit and may not know how to prepare or what questions to ask. Understanding the general steps involved can help reduce uncertainty and make the process smoother. We will explore what you can anticipate from the initial knock on the door to the moment your water heater is functioning again, so you feel informed, confident, and prepared.
Steps You Can Expect During a Water Heater Repair Appointment
- Initial Greeting and Diagnostic Evaluation
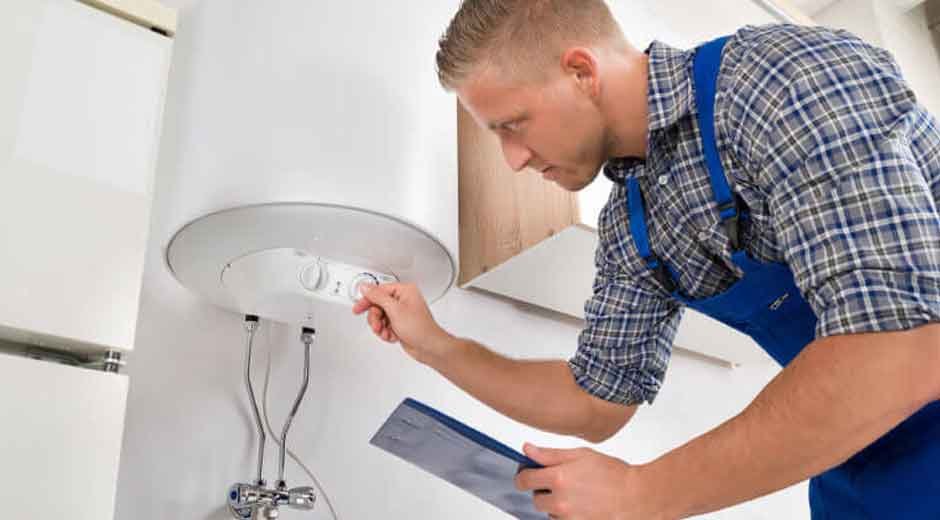
The repair visit typically begins with a polite and professional greeting from the plumber or technician. After introducing themselves, they will usually ask you for a brief description of the issue—whether you’ve noticed cold water, strange noises, leaks, or other changes. From there, they’ll visually inspect the area around your water heater to assess its age, location, and setup. Most technicians performing Fort Collins water heater repair will also inquire about the last time the unit was serviced or if any prior issues were addressed. Once the initial overview is complete, the plumber may begin diagnostics by checking the thermostat settings, power supply (for electric units), gas valve operation (for gas units), and visible signs of wear.
In some cases, they’ll test the water temperature, examine the anode rod for corrosion, or check the heating elements. Their goal during this stage is to narrow down the cause of the malfunction. It’s normal for this part to take 15–30 minutes depending on the complexity of the problem. Communication is usually maintained during the process to help you understand what they’re finding and what might be necessary for repair.
- Explanation of the Problem and Possible Solutions
Once the issue is identified, the technician will explain what’s wrong with your water heater in clear terms. Whether it’s a failed heating element, sediment buildup, or a leaking tank, they will walk you through what that means and why it happened. It’s during this step that they will likely discuss options for moving forward. This could involve replacing a part, cleaning internal components, or even suggesting a full replacement if the unit is outdated or damaged beyond repair.
Most professionals will provide a breakdown of the costs involved, giving you a chance to review before any work begins. They may also discuss how long the repair will take and whether they need to leave temporarily to obtain the necessary parts. This is your opportunity to ask questions—such as how long the fix will last, what maintenance you can do going forward, and whether any parts have warranties. A clear, open conversation helps both parties stay on the same page before proceeding.
- Performing the Repair and Safety Measures
After you’ve agreed to the proposed repair, the technician will begin working on your water heater. Depending on the diagnosis, this could involve draining the tank to remove sediment, replacing thermostats or heating elements, patching a leak in a pipe connection, or adjusting the burner. Safety is always a priority during this step. If the unit is gas-powered, the technician will turn off the gas supply and carefully relight the pilot when the work is finished. For electric heaters, the power is shut off from the circuit breaker to avoid electrical hazards.
If the work requires emptying the tank, a hose will be used to direct water safely to a nearby drain. While performing the repair, the technician keeps tools organized and maintains a clean work area to minimize disruption to your home. The repair process itself may take anywhere from 30 minutes to two hours, depending on the severity of the issue and the ease of accessing or replacing the necessary parts.
- Testing the System for Functionality
Once the repair is complete, the technician will test the water heater to ensure it is functioning properly. This involves verifying that the unit heats water to the correct temperature, that there are no leaks, and that all components are reassembled correctly. For electric heaters, they’ll monitor how the heating element cycles. With gas models, they’ll check burner ignition and proper gas flow. Often, the technician will run the hot water from your faucets to verify that warm water is flowing consistently.
They may also ask you to monitor the system over the next 24–48 hours for any signs of recurring issues. If you’re not sure what to look for, they will provide you with guidelines. In some cases, they’ll adjust temperature settings for energy efficiency or to meet your personal preferences. Once everything checks out, they’ll confirm that the repair has restored proper operation. This final testing phase is crucial to ensure the job was successful and your comfort is restored.
A professional water heater repair visit is more than just fixing a mechanical issue—it’s a multi-step process that ensures your comfort, safety, and the longevity of your appliance. From the initial inspection to the final cleanup, each stage is handled with care to accurately diagnose the problem, implement the right solution, and restore your home’s hot water supply. By understanding the full scope of the service, homeowners can better maintain their systems and prevent future issues with confidence.